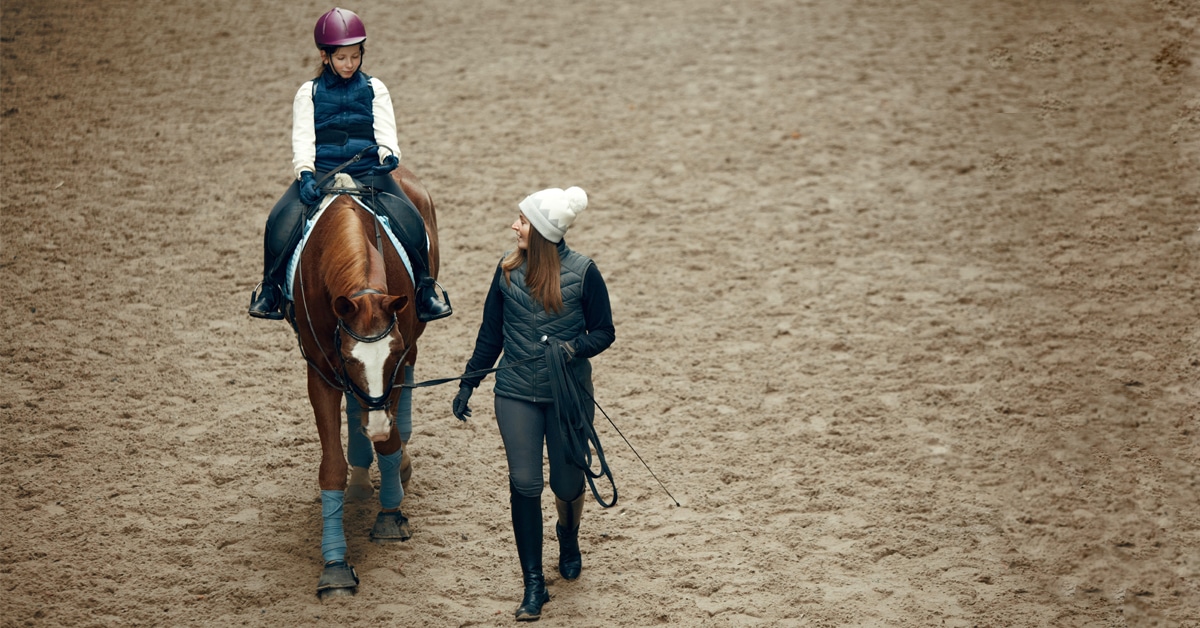
In the last article we talked a lot about what we can do with our young horses on the ground as we get them started. Following the steps therein, your horse should now be comfortable being tied, groomed, tacked up, led in hand, standing at the mounting block, and basic lungeing. The next steps are additional lungeing skills and ground driving. https://horsesport.com/magazine/equine-ownership/training-young-horses-part-1-early-groundwork/
Additional Lungeing Lessons
When teaching a horse to lunge, I like to start without side reins. The horse should learn to be very comfortable staying out on the circle because of your body language and voice commands.
As we noted in the last article, the equipment should be a rope halter with a bridle over top (without a noseband) and a surcingle with side reins, although not yet attached. Your lunge line should be attached to the rope halter and eventually when the side reins are attached they will be the only connection to the bit.
We also like to put our surcingle over top of the saddle – this helps keep it more secure and therefore more trustworthy for the horses to learn about consistent contact.
At the start it’s important to keep the horse close to you on the lunge line. I prefer to maintain a 10-12 foot distance while teaching the horse about the circle, moving around us, and staying out on the desired path. Always wear gloves and carry a lunge whip. We always carry a whip – it is an extension of your arm when you create a triangle (your body as one point and the head and tail as the other points). The whip also is our forward aid most similar to the leg we will use when we are mounted, and the whip is instrumental in teaching boundaries. A common action for young horses is to try to turn around or come in towards you; establishing a triangle without being too far away will help prevent any disruptions.
As your horse builds confidence, you can start to be further and further away. Eventually you would like to be able to stand in one spot while the horse goes around you while maintaining a consistent distance.
I believe horses understand the tone of your voice the easiest, so I don’t try to teach them specific words for walk, trot and canter, but rather I use a higher- or lower-pitched voice depending on what I’d like them to do. If I want an upwards transition, I will make a sound or speak a sentence in increasing pitch and tone, while a downward transition would be guided by a sound of decreasing pitch and tone.
Another tip is to speak in whole sentences – that draws out the sound longer for them to either go faster or slower, with the added benefit of them learning your voice and drawing confidence from it. This will become very useful when you are up on their back. Speaking in full sentences once you’re mounted has the additional benefit of keeping you as the rider breathing in a new and potentially tense situation as well.
Horses learn best from consistency, so every time you want to change directions while lungeing, use the same process: tuck your whip up under your arm (instead of dropping it to the floor), and start to walk towards them while tidily gathering up your line (never wrap it around your hand; loop it across your palm). At the beginning they might want to turn towards you, so keeping your line organized and not asking them to halt out on the circle first is key to control and understanding. Tucking the whip under your arm can become an indicator of what is to come, as your horse gets more in tune with your body movements.
When moving towards the horse to change, I always like to go to the shoulder instead of their head – this affirms to the horse that we are addressing the side of their body, and not looking for them to turn to face us. Of course, this is a vulnerable place for them to allow you in, so it may take some patience – and consistency – to learn.
It won’t be long before you tuck your whip under your arm and they come to a halt, staying out on the circle without another word being said.
When this level of understanding of the lunge circle is established, you can then add the side reins. The purpose of lunging with side reins is to begin the conversation about contact, moving forward into contact, accepting contact, and ultimately encouraging the horse to seek the contact. I like to use the inside rein alone at first and then add the outside, keeping them loose to start, and starting with the reins attached to a fairly low ring on the surcingle.
This is a good time to also note that removing the donut rubber piece in the middle of most side reins is a good idea. The stretchy nature of the donut tends to confuse many horses and doesn’t promote consistent contact, but rather a bouncing intermittent contact.
As your horse gets comfortable with the side reins you can gradually shorten them and raise them up to an angle similar to where your hands will be when mounted.
Every day, we like to start anew, meaning we start with side reins loose and gradually tighten to make sure the process is consistent. Going through all of the steps – even if quickly – every day helps solidify the learning. Another pro tip is when you are done lungeing you should lengthen the side reins out to the beginning length or longer and cool your horse out in hand like that. This is a good way to keep the conversation going about contact while encouraging stretching.
Introducing Ground Driving
The next step is ground driving. The equipment you will need is all the same, with the addition of a second matching lunge line, and we no longer need the side reins. You will also need another person to help you to start. The long line will go through a loop on your surcingle and connect to the bit, and do the same on the other side with the second line. It’s important to go slowly, talk all the time and desensitize the horses while you are working away, as they get used to the lines touching their sides and over their back.
Once you are all situated with your lines, standing behind the horse about 10 feet away (you’d be surprised how far a hind leg can reach if they were to kick!), have your person with a lead line attached standing up at the horse’s head. The handler can begin to walk forward and the two people should be in constant communication as the horse gets used to what’s going on. If the driver goes silent for too long, the horse may forget they are back there and then be surprised when they see or hear you.
Before you begin to trot, the driver should jog almost on the spot to desensitize the horse to the action before they also are trotting. Only when the horse is very comfortable with the driver running behind them should you attempt this without a leader. After a bit of time and practice, the handler should no longer be necessary to drive, and transitions, steering, turning and changing directions can become wonderful gateways to the future riding experience.
Get your running shoes on and prepare to sweat – running while talking is the best form of cardio!
Next up: actually getting on your horse!
The Latest